Blog 8- Yoda Bookmark
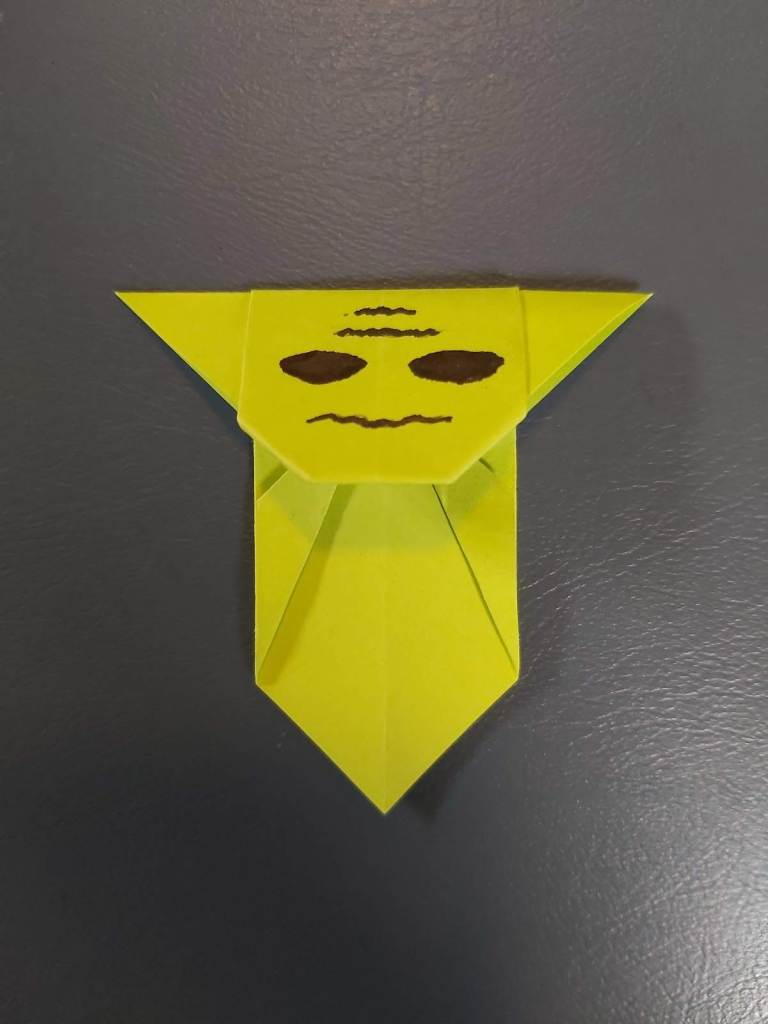
For this week’s project I decided to make an origami Yoda bookmark. In my past experience I have created an origami Yoda but not as a bookmark. If you are interested in making an origami Yoda bookmark I will put the link to the video I used at the end of this post. If you are also interested in making any other Star Wars origami I will also put a link to a website with multiple origami Star Wars instructions.
In order to make this project you will need one post-it note (green for best results) and a black marker to draw Yoda’s facial features. You can use a bigger piece of paper if you want a bigger bookmark but a post-it note is the perfect size in my opinion.
Overall, I would rate this project as four out of 10 stars. I gave it this rating because it was fairly easy to make but in order for the product to turn out good you have to make the folds nearly perfect. Similarly to previous projects the adhesive part of the post-it note did not affect the project much at all.
If you as a reader are interested in creating your own origami Yoda bookmark or other Star Wars origami projects, click the corresponding link below. Like always if this is your first time making an origami project, do not get frustrated if it doesn’t turn out the way you want it to, practice makes perfect.
Link to video: https://www.youtube.com/watch?v=aEKfaRCeh70&list=PLUistU9g4l7SooQ_GEuLGZhVZI9mJ2HM5&index=4
Link to Star Wars Origami Website: https://origamiyoda.com/how-to-fold/
Blog 7- Turtle
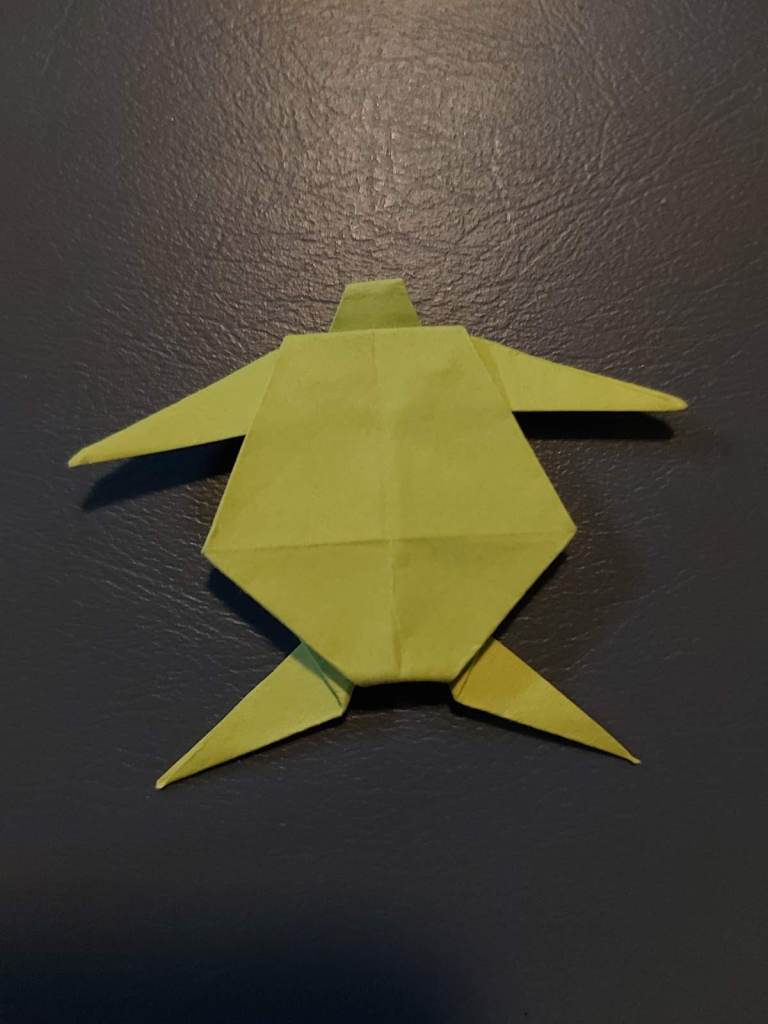
For today’s origami post I decided to make a turtle. Making an origami turtle was a new experience for me but some of the beginning folds were very similar to the beginning folds of a previous project, the ninja sai. This project was fairly easy to make so I would suggest giving it a try. I will put the link to the video at the end of the blog so if you as a reader are interested in giving this project a try you can.
For this project, you will need one post-it note. and a pair of scissors. Due to the fact that you have to use scissors, I don’t really consider this to be 100% true origami but for this one post, I will make an exception. For this project, it doesn’t matter what size of paper you use. Post-it notes work fine but if you want a bigger turtle you can use a different size of paper.
Overall I would rate this project as one out of ten stars in difficulty. This project wasn’t really difficult to make and it didn’t take a long time to make. In my opinion, the video helped with this rating because it was super easy to follow. So if you as a reader want to make a quick and easy project, an origami turtle is the project for you.
Like always the video for how to make this project is below and if you get stuck keep trying.
Video Link: https://www.youtube.com/watch?v=dI7i1_M_OYk
Blog 6- Skeletal Cube

For this week’s origami project I made a skeletal cube. This project was new for me but after folding a few of the parts it was really simple to make. If you as a reader really want to try to make something using origami and haven’t made any of the previous projects I would making this one because the folds are very simple. The link to the video that I used will be put at the end of this post if you as a reader are interested in this project.
To make this project you will need a total of 20 post-it notes. If you want to use two different colors like I did you will need 8 of one color and 12 of the other color. For this project I would recommend using post-it notes because with even by using post-it notes the project turned out a little bit bigger than the previous projects.
Overall, I would rate this project as a two out of 10 stars. Like I said earlier this project is pretty straight forward and easy to make. The assembly was a little difficult but it wasn’t too bad. The only thing with this project is that you have to have patience when making it because you have to fold 20 different pieces which take a little while to do.
If you as a reader are interested interested in making your own skeletal cube, the video will be linked below, and if you get stuck keep trying.
Video Link: https://www.youtube.com/watch?time_continue=422&v=HtcDEE15n0o&feature=emb_logo
Blog 5- Rose
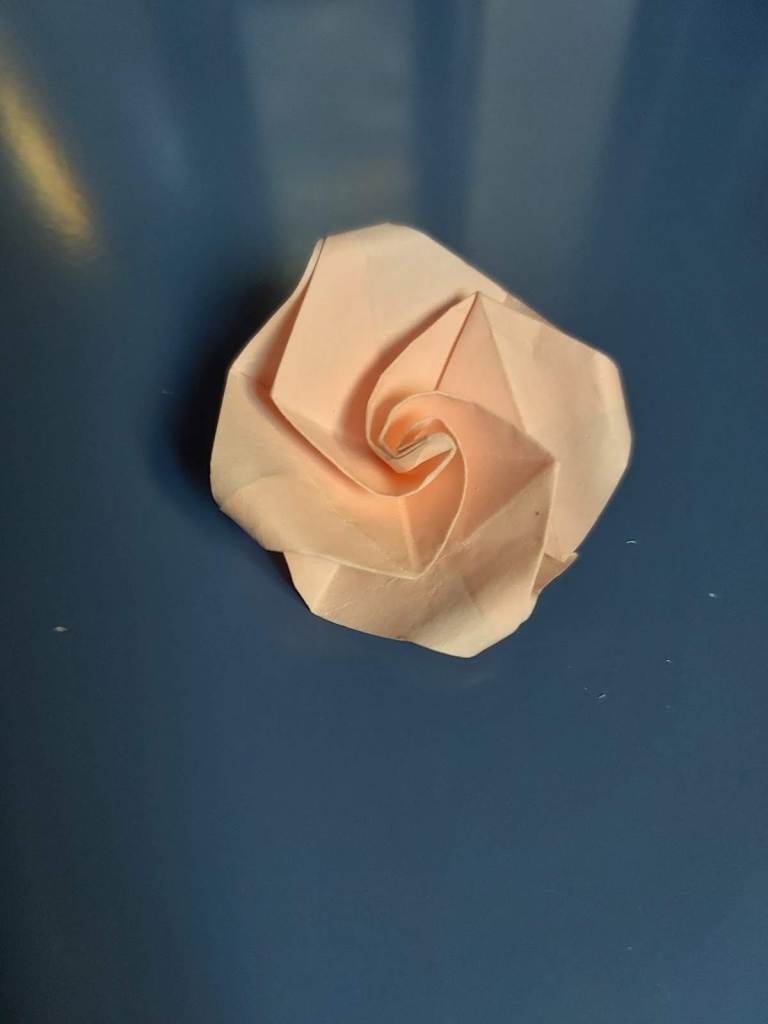
The origami project that I made this week was an origami rose. Before this post, I had never made an origami rose. However, with many discussions of the Bachelor finale, I decided this would be an appropriate project for this week. If this project interests you the link of the video that I used will be placed at the end of this post.
In order to make the rose, you will need one post-it note. I used a pink one but any color will work. However, if you want a bigger rose you can use a bigger piece of paper like construction paper or printer paper.
Overall I would rate this project as three out of 10 stars. I gave it this rating because it was fairly easy to make and the beginning folds were similar to the crane, but some of the steps were difficult to follow. Also, using a bigger piece of paper would have made the project a little easier but it isn’t required.
If you as a reader would like to try to make your own origami rose, click the link below and follow the steps in the video. Like always if this is your first time doing origami don’t get frustrated, practice is key.
Link to video: https://www.youtube.com/watch?v=-jfmMyCTqqg
Vlog 1- Transforming Ninja Star
Blog 4- Trigonal Bipyramid
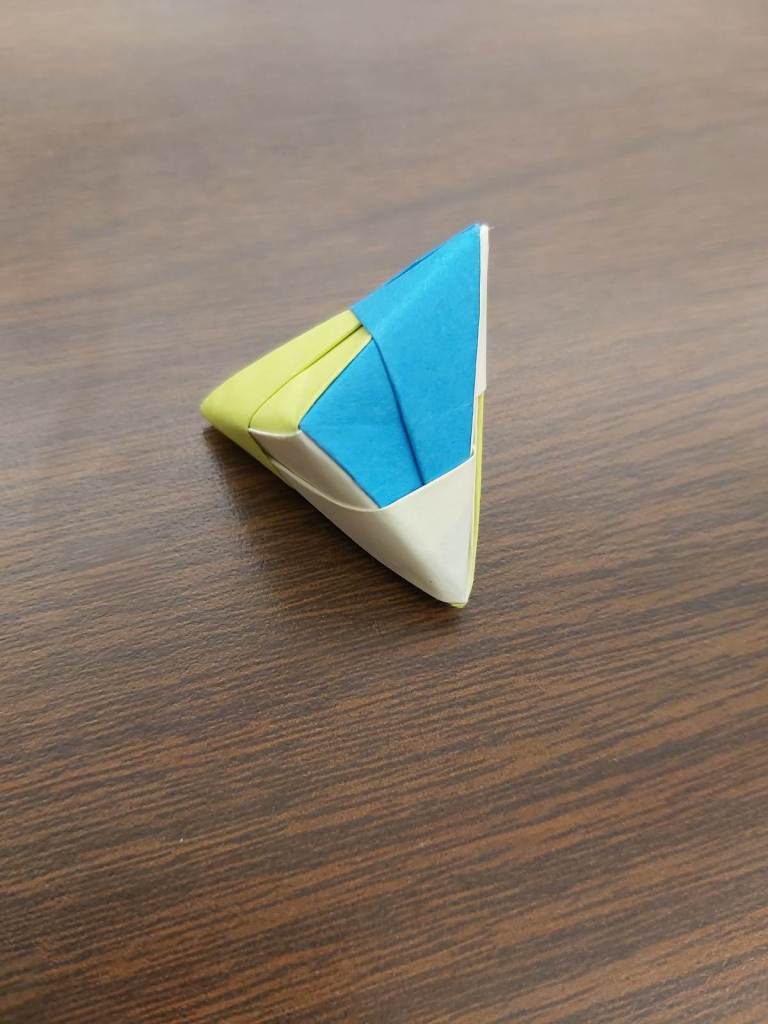
This origami project that I made this week was a “trigonal bipyramid” model. Before this experience, I had never created an origami trigonal bipyramid. I found that the finished product was very neat and I was fascinated with how it looked. If you want to create this project and haven’t made any previous projects I would recommend making this one because the folds are pretty simple for the most part. The link to the video that I used will be put at the end of this post if you as a reader are interested in this project.
To make the trigonal bipyramid you will need three post-it notes. I would recommend using three different colors so that it is easier to assemble and it will look better too. However, if you only have one color it won’t be a big issue. For this project, I recommend using post-it notes because for this project they are a perfect size and the sticky part of the note is helpful to keep the pieces together when assembling the final product.
Overall, I would rate the difficulty as a four out of 10 stars. I gave it this rating because it was easy to make all of the pieces at the beginning and the post-it note aspect of the project worked out well. The only thing that was a little bit of a struggle was assembling the pieces at the end because the video wasn’t very clear on where to put the different parts. In the end it everything worked out.
If you as a reader are interested in making a trigonal pyramid, the video is linked below, and if you don’t get it right away, don’t give up.
Video Link: https://www.youtube.com/watch?v=ZVVE1J0hgkE
Blog 3- Ninja Sai
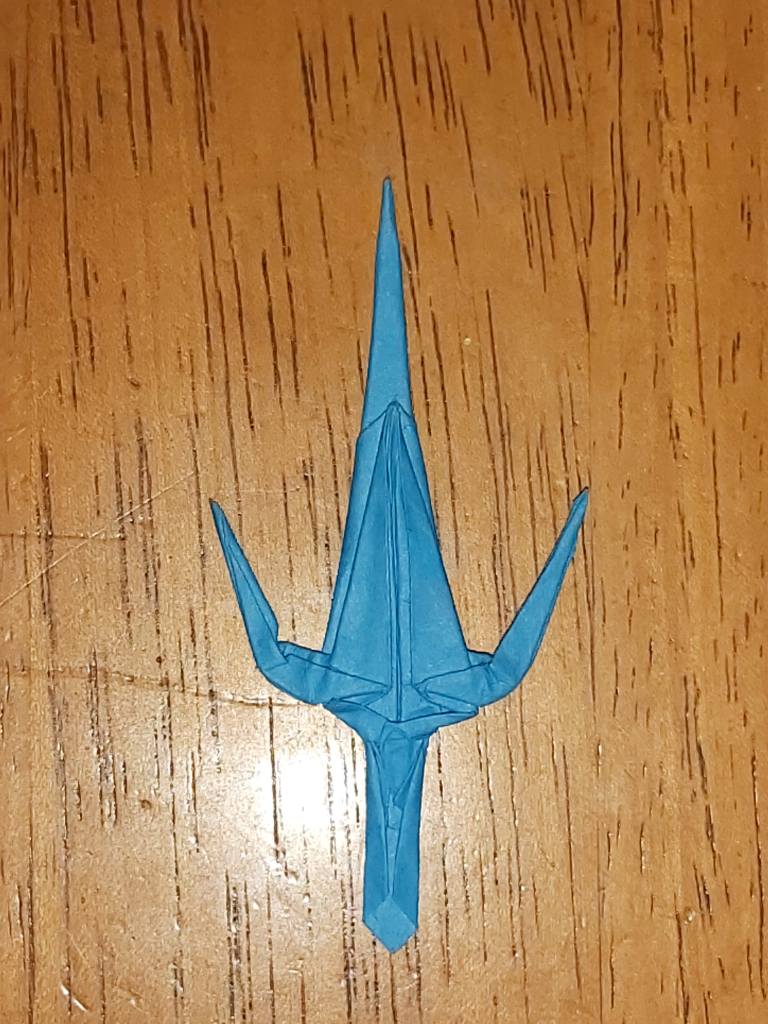
For this post I decided to make a ninja sai. Before this experience I had never made an origami sai. However, some of the beginning folds were similar to the beginning folds of the crane that I made in the previous blog. Like always the link that I used to make this will be put at the end of the blog.
In order to make the sai I used one post-it note. However, I would recommend using a bigger piece of paper such as a piece of printer paper. This will make it easier to make some of the folds.
Overall I rate the difficulty as a seven out of 10 stars. I gave it this rating because the directions were a little difficult at times and some of the folds were difficult to make. Also, using a post-it note made it harder to make but, with a little bit of extra work I was able to complete the sai.
If you as a reader are interested in making and origami sai, the video is linked below, and like always, if you don’t get it right away keep practicing.
Video Link: https://www.youtube.com/watch?v=sN5f6YBMBMk
Blog 2- Crane
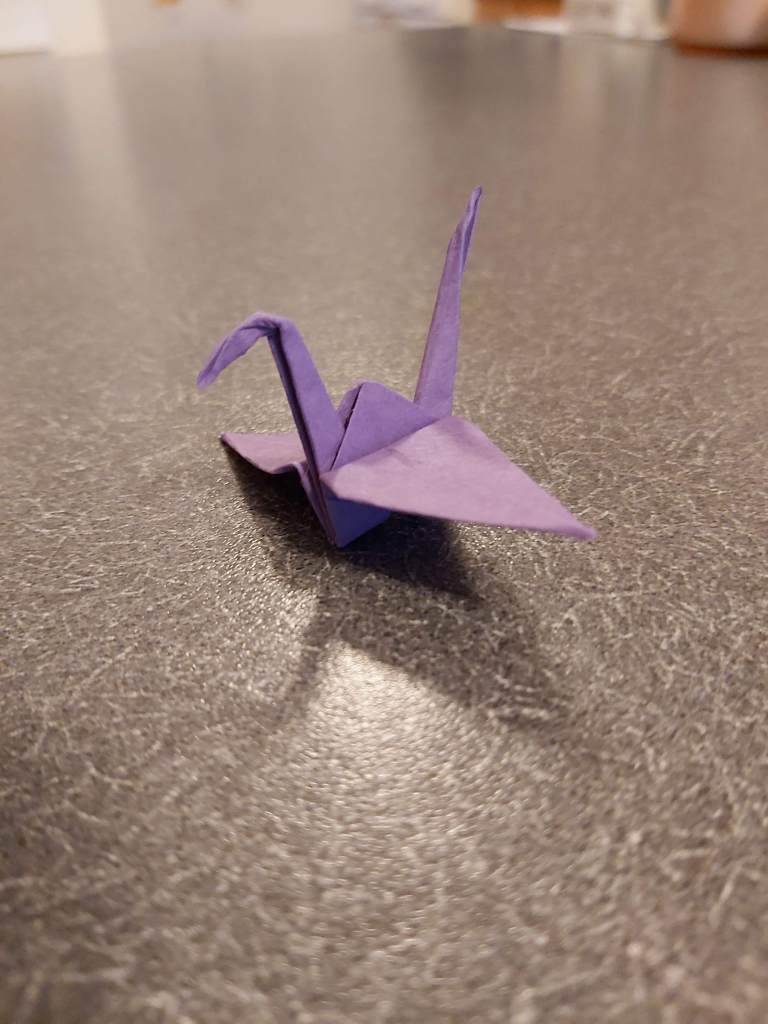
This week I decided to make a simple, more, traditional origami piece. I chose to make an origami crane. This is a piece I feel that every person should learn to make if they are interested in origami. I have made cranes before but it’s been a while. Making a crane this week helped refresh my memory. The video that I used will be placed at the end of this blog post if any readers want to try to make it for themselves.
In order to make the crane I used one post-it note. However, I would recommend using a different piece of paper such as a piece of printer paper. This will make it easier to make because it has a larger surface area and it is not sticky. These were two things that I found to be difficult while making the crane.
Overall, I would rate the difficulty as a three out of 10 stars. I gave this rating because it was easy to follow the instructions but the sticky note’s small size and stickiness made it harder to make. However, through patience, I was able to make the crane and I am happy how it turned out.
If you are a reader and you would like to make an origami crane, the video is linked below, and like always, if you don’t get it right away keep practicing.
Video Link: https://www.youtube.com/watch?v=KfnyopxdJXQ
Blog 1- Five-Point Ninja Star
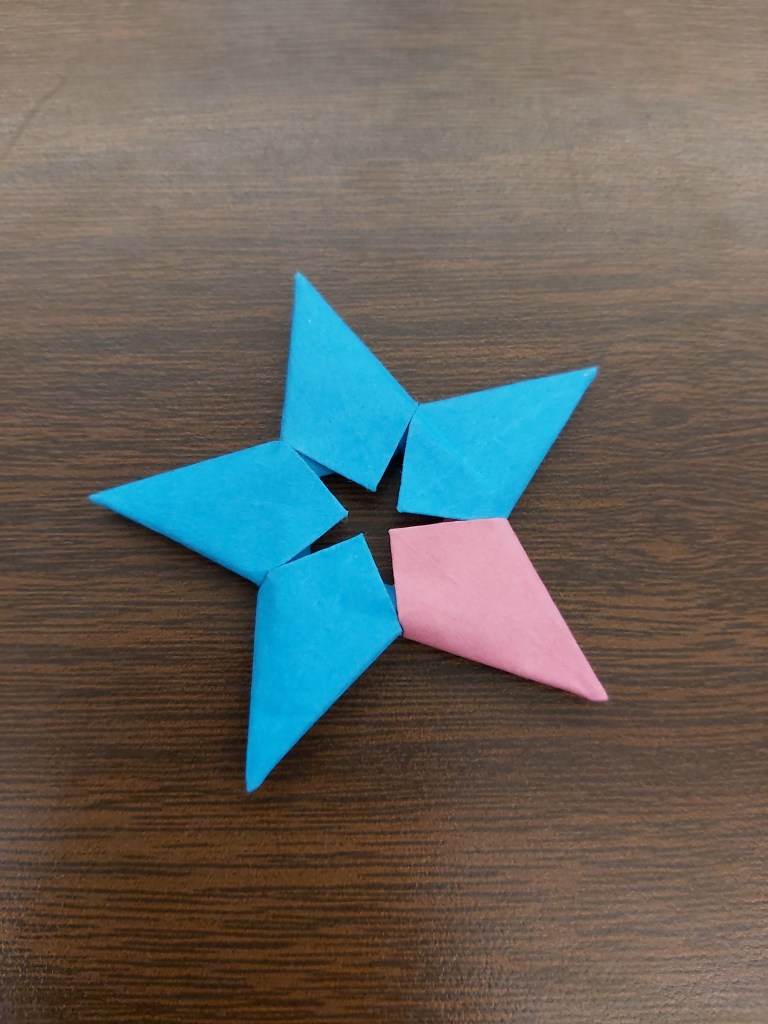
The origami project that I attempted this week was a five-point ninja star. In my past experiences with origami, I have enjoyed making ninja stars of different types. However, I have never made one with five points so I was intrigued to try it. The video I used on how to make the ninja star will be put at the end of this blog post if any readers have an interest in making one themselves.
In order to make this ninja star you only need three post-it notes and a pair of scissors if you want to make a clean cut while cutting the paper in half. Once you cut the post-it notes in half you will need 5 of the halves to make the ninja star.
Overall I would rate the difficulty as two out of 10 stars. I gave it this rating because while it was easy to cut the paper into halves and to fold the different point, the assembly was a bit difficult. However, with a little patience, I finally got the pieces to fit together.
If you as a reader want to try to make the five-point ninja star this project click the link below and follow the steps in the video. If this is your first time ever doing origami do not get frustrated if you can not get it on the first try, practicing is key.
Link to video: https://www.youtube.com/watch?v=20-KshPtIG8
